
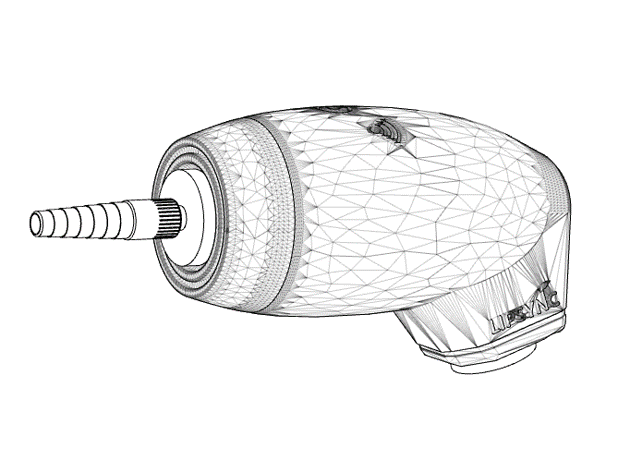
The LipSync (opens in a new window) enables users with limited hand movement to use a smartphone, computer, tablet, or game system by using a mouth operated joystick. Moving the mouthpiece moves the cursor, and sipping and puffing on the mouthpiece inputs clicking functions.
However, for some potential LipSync users, sipping and puffing into the mouthpiece can be difficult or even impossible, whether that be due to difficulty in forming the lips around the mouthpiece, or difficulty generating a sufficient sip or puff due to lung capacity or usage of a ventilator.
To allow these users to take advantage of the LipSync, we’ve designed a LipSync Switch Input Module (opens in a new window). This modification allows a user to utilize two compatible assistive switches instead of the sipping and puffing to perform left and right clicks. We designed the module to be compatible with existing LipSyncs, inexpensive, and relatively easy to install.
Operation

The two assistive switches are connected to the LipSync via an adaptor to the Switch Input cable. These switches can be any commercially available or DIY switches that close momentarily and have a 3.5 mm plug.
A LipSync with the Switch Input Module installed works the same was as a LipSync, except that instead of applying sips and puffs, a user activates one of two assistive switches. The LipSync will no longer respond to sips and puffs on the mouthpiece.
Design

The new 3D printed circuit board
In designing the LipSync Switch Input Module, we wanted to make the modification as easy as possible. That means using the existing hardware, and not requiring any software or firmware changes. And it needed to be inexpensive and easy to make.
We considered a variety of ways of adding switch input functionality to the LipSync, including modifying or replacing the existing pressure sensor PCB, utilizing unused pins on the Arduino Micro (opens in a new window), or creating an additional external device. To be able to use the existing code, we decided to utilize the pressure sensor interface.
We replaced the analog pressure sensor that measures the sips and puffs with a balanced resistive voltage divider circuit. When the external switch is activated, the same voltage that is generated by a sip or puff is produced and measured by the LipSync. Basically, this means that without needing to change the coding, the sip and puff functions are disabled and the LipSync will respond instead to the connected switches in the same way.
Instead of using a custom printed circuit board, we created a 3D printed circuit board. Custom PCBs are easy to solder, but they can be a little tricky to obtain if you aren’t familiar with the process. In contrast, 3D printed circuit boards are a little trickier to solder, but much easier and less expensive to obtain. The 3D printed circuit boards help align and hold the components and a clever arrangement of the part leads take the place of the traces.
New Housing
The Switch Input Module uses the same software and firmware, but it requires a modified housing. We have modified the 3D printed LipSync shell to accommodate the switches, by adding an additional opening for the Switch Input Cable to exit the LipSync.
We also used this opportunity to make a few more changes to the rear housing:
- We added an additional hole for a Bluetooth status light. Now, users can see the status of the Bluetooth connection for the LipSync Wireless. To help differentiate between the Bluetooth status light and the LipSync status light, we added icons into the rear housing.
- We modified and widened the cable openings to provide more clearance for the USB cable and the Switch Input cable. This will reduce the likelihood of the cables being damaged by the mounting hardware.
- Inside the rear housing, we added some additional clearance and extended the guides to make it easier to assemble the electronics into the housing.
Building the Switch Input Module
The Switch Input Module consists of some electronics and commercially available parts that are soldered using a 3D printed circuit board. It is designed to be interchangeable with the existing pressure sensor PCB.
For makers, the module is not too difficult to build and it’s inexpensive with parts costing between $11 and $25.
For instructions on how to assemble the switch adaptation, refer to our assembly manual (opens in a new window) for step-by-step instructions.

Before (top) and after (bottom)

Installation & Setup
It is important to note that there are two types of mono-to-stereo adapter cables, so make sure you get the correct one. The more common type, used for sharing audio from one device to two sets of headphones, won’t work.
Resources
You can request a LipSync Switch Input Module on its project page (opens in a new window)
All LipSync Switch Input Module files can be found in the GitHub repository (opens in a new window)
We’ve also created a user guide (opens in a new window) to help you get started with the LipSync Switch Input Module.
The LipSync Switch Input Module works best with the switches that work best for you. Switches come in many different shapes and sizes and address many different needs. To help you choose the right switches for your needs, we’ve created a guide (opens in a new window) comparing the various switches in our Assistive Device Library (opens in a new window), as well as through various assistive device distributors.
This post originally appeared on the Makers Making Change (opens in a new window) website.